
Valheim bosses in order
Eight forsaken rule the tenth world, one per biome, and the game expects you to face them in order: each one drops the item that unlocks the next stage of progression. Find their altars through the red-glowing vegvisir stones, pay the summoning cost, and mount the trophy at the Sacrificial Stones to claim a forsaken power you can trigger whenever you need it. Kall Fimbulbringer, the last, is the only one who grants no power. Each kill also changes what the world throws at your base: the raid table switches on and off as you go.
| # | Boss | Biome | Summon | Health |
|---|---|---|---|---|
| 1 | Eikthyr | Meadows | 2 Deer Trophies | 500 |
| 2 | The Elder | Black Forest | 3 Ancient Seeds | 2,500 |
| 3 | Bonemass | Swamp | 10 Withered Bones | 5,000 |
| 4 | Moder | Mountain | 3 Dragon Eggs | 7,500 |
| 5 | Yagluth | Plains | 5 Fuling Totems | 10,000 |
| 6 | The Queen | Mistlands | Sealbreaker (9 fragments) | 12,500 |
| 7 | Fader | Ashlands | 3 Bells (9 Bell Fragments) | 25,000 |
| 8 | Kall Fimbulbringer | Deep North | 3 Malicious Blood | 52,800 |
1. Eikthyr
Eikthyr's altar stands in the Meadows, rarely far from spawn. The red-glowing vegvisir at the Sacrificial Stones marks the nearest altar on your map. Lay two  Deer Trophies on the altar to call him. Like every Forsaken, he can be summoned again whenever you can pay the price.
He drops  Hard Antlers and his trophy. The antlers craft the
  Antler Pickaxe, your first mining tool, and with it copper, tin and the whole bronze tier open up.

2. The Elder
The Elder's altar hides in the Black Forest. Vegvisirs inside Burial Chambers point to it. Burn three  Ancient Seeds in the offering bowl to summon him; the seeds drop from Greydwarf brutes, shamans and the nests they guard.
He drops the  Swamp Key. It unlocks Sunken Crypts, the main source of scrap iron and the reason to fight him at all.

3. Bonemass
Bonemass sleeps under a skull-marked stone in the Swamp. Vegvisirs in Sunken Crypts reveal the altar. Offer ten  Withered Bones, dug from muddy scrap piles and looted in the crypts themselves.
He drops the  Wishbone. Wear it and it pings buried silver veins in the Mountains, muddy scrap piles in the Swamp and hidden treasure elsewhere.

4. Moder
Moder's altar crowns a mountain summit. Vegvisirs wait in ruined stone towers near the peaks. She demands three  Dragon Eggs from drake nests, and each egg weighs 200, so plan a trip per egg or wear the
  Megingjord from Haldor.
She drops  Dragon Tears. They build the
  Artisan Table, which unlocks the blast furnace, the windmill and the rest of the Plains workshop tier.

5. Yagluth
Yagluth's altar is a giant stone hand reaching out of the Plains. His vegvisir hides in Stonehenge formations and spawns rarely, so you may stumble on the altar first. Five  Fuling Totems summon him; raid fuling villages to collect them.
He drops the  Torn Spirit. It builds the
  Wisp Fountain, and without wisps the Mistlands stays a wall of fog.

6. The Queen
There is no altar in the open world. The Queen waits inside the Infested Citadel, a sealed dungeon in the Mistlands. Vegvisirs in Infested Mines mark the citadel, and the door only opens to a  Sealbreaker, forged from nine fragments looted in those same mines. The first fight costs nothing. To face her again, offer three
  Seeker Soldier Trophies at the hive seat above the arena.
She drops the  Majestic Carapace, which builds the
  Artisan Press.

7. Fader
Fader's arena is a coliseum in the Ashlands. Vegvisirs sit in the central towers of Charred Fortresses. Collect nine  Bell Fragments from those fortresses, forge them into three
  Bells, and hang the Bells at the coliseum to wake him.
He drops the  Kindled Ribs and his trophy. The ribs are proof of the kill; the power is the prize.

8. Kall Fimbulbringer
Kall waits at the bottom of an Aesir Passage, a Deep North location a world places three of, and the bowl down there takes three  Malicious Blood. Each one costs a Jotun Invasion, which means the last fight in the game is gated on an event back in the old world rather than on anything you find in the north.
One invasion is one blood. Breaking the Black Ice in a Mörkhalla dungeon, 1,000 health and no drop of its own, starts it and marks it on the map. The invasion itself lands in the Meadows, Black Forest, Swamp, Mountain or Plains, somewhere between 1,000 and 12,000 metres from the centre of the world, and freezes a 100 to 300 metre radius of ice shelves around a Black Ice Core. The core is another 1,000 health, and while it stands it feeds the area: one wave every 50 seconds once you are within 120 metres, up to 6 near you and 50 in total, half 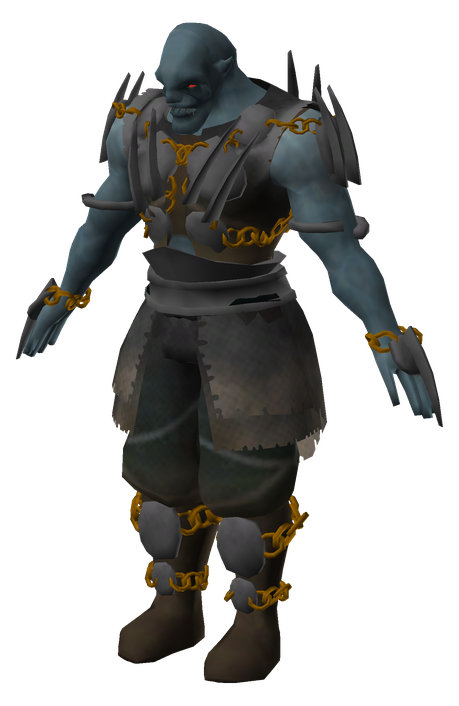 Krigen and the rest
 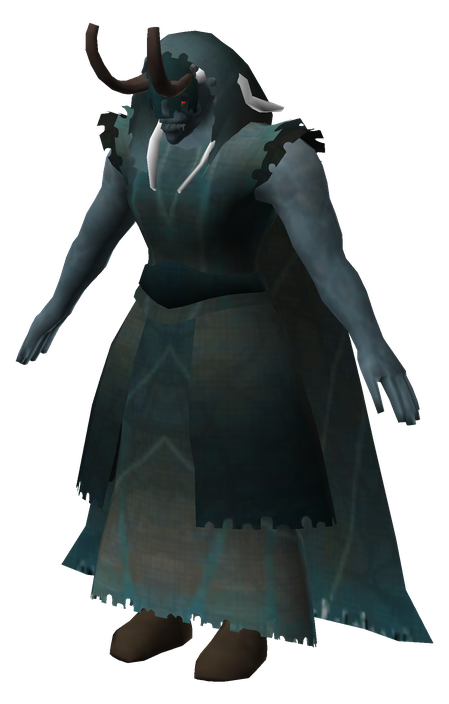 Hexen and dual wielders, any of them up to two stars. Break the core and it drops exactly one Malicious Blood and ends the invasion, though the Jotun already standing stay where they are, so clear them or leave. Three cores, three bloods, one fight, and another three for every rematch.
Up to three invasions can run at once and they sit at least 400 metres apart, so you can start all three from Mörkhalla and collect in one trip. Offer at the bowl and he tears out of the chains 12 seconds later.
He drops  Sacrificial Blood and the
  Crown Jewel, and that is the end of the chain that started with a stag in the Meadows. The jewel plus five
  Bloodgold at a level 4 black forge makes the
  Crown of Valheim: 50 armour, 5 percent movement speed, 20 percent off attack, run, swim and sneak stamina, and every creature that sees you flees instead of fighting. Worth knowing before you assume it trivialises a rematch: the fear check skips anything in the Boss faction, so Kall and the other seven ignore the crown entirely.
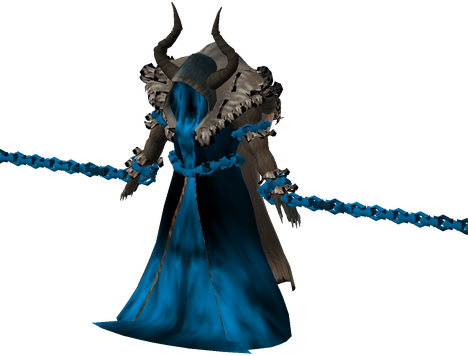
Kall Fimbulbringer closes the chain. 1.0 opened the Deep North and put the last of the forsaken at the top of the world, fought in three phases rather than at an altar you summon. If a boss altar refuses to spawn where a guide told you it would, remember every world is different: check your own world on the seed map and it will show you exactly where each altar sits, or start fresh on one of the best seeds with bosses close to spawn.